Automating Deployment from GitLab to Google Cloud Run
Introduction
In modern software development, automation isn’t just a luxury — it’s a necessity. Continuous Integration and Continuous Deployment (CI/CD) pipelines help teams release updates faster, safer, and with consistent quality. For cloud-native applications, automation ensures that every code change moves smoothly from commit to production with minimal manual effort and a significantly reduced risk of human error.
Typically, development branches map to pre-release versions, while merges into the main or release branches generate stable, tagged builds. This simple but powerful practice keeps deployments traceable and predictable.
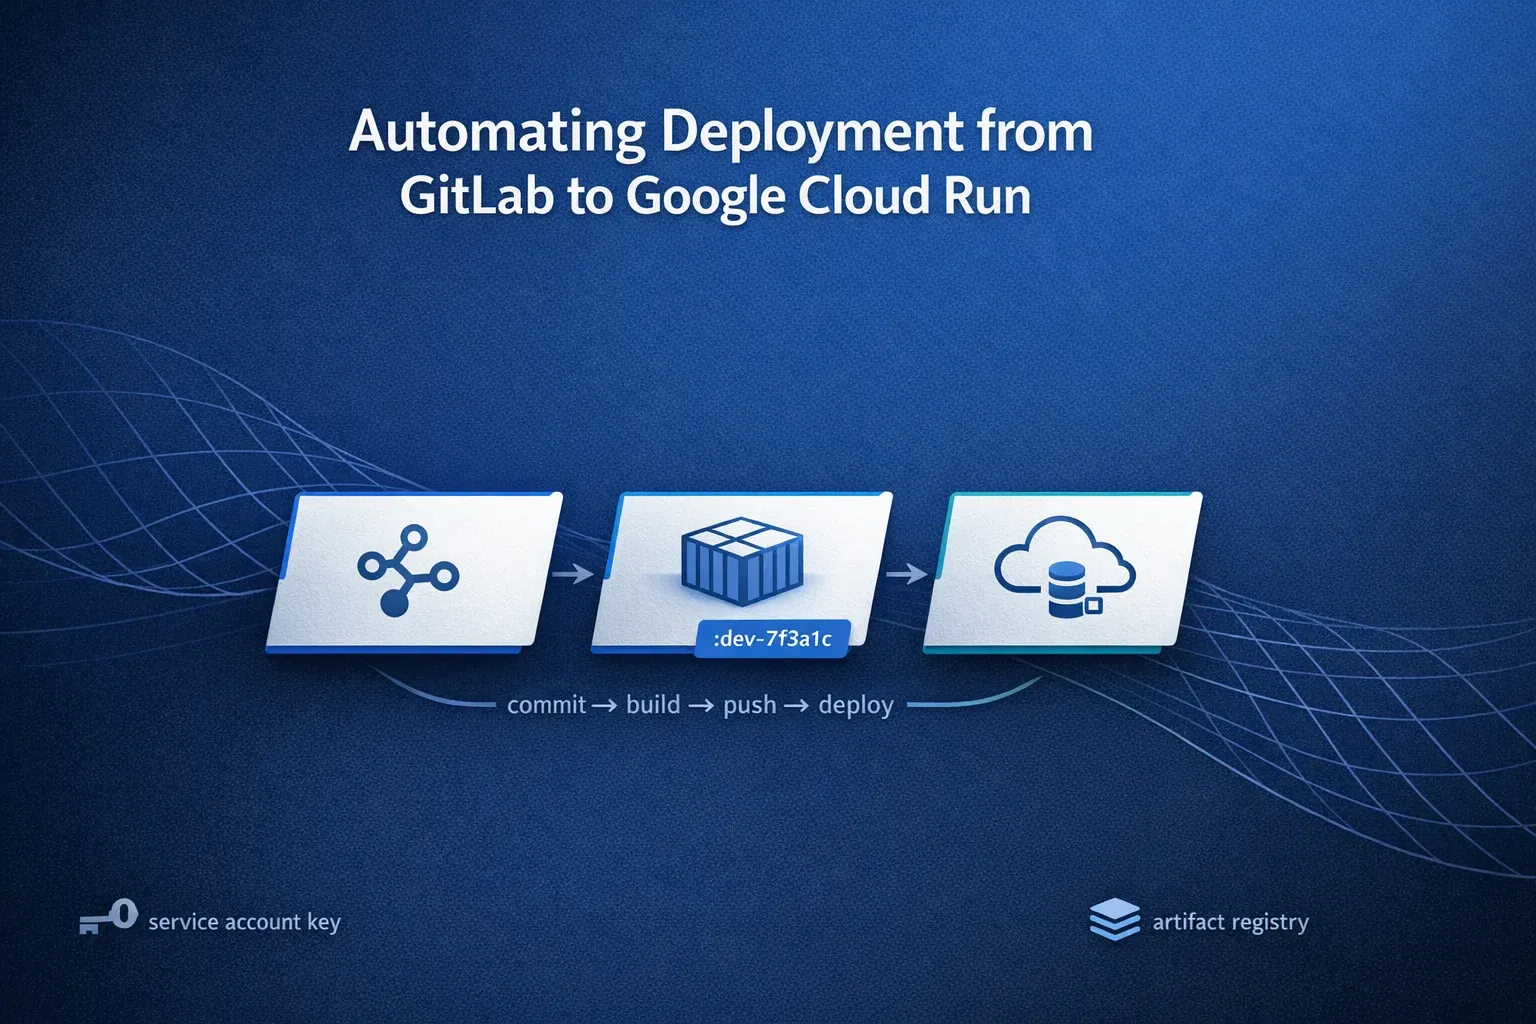
In this guide, we will walk step-by-step through automating deployments from GitLab to Google Cloud Run using Artifact Registry. You’ll see how a simple code push can automatically trigger your CI/CD pipeline to build, store, and deploy your application.
Setting Up the Foundation
Before writing the pipeline, we need a strong foundation—specifically, how the application is containerized and how Google Cloud is configured. Don’t worry, each part will connect beautifully later.
Dockerfile and Multi-Stage Build
A Dockerfile defines how your app is packaged so it runs exactly the same everywhere—whether on your laptop, a staging server, or production.
For production-grade applications, we use an optimization technique called Multi-Stage Builds. Instead of using one heavy image for everything, we divide the build into two clean stages:
-
Stage 1 (Builder): Installs dependencies and builds the app.
-
Stage 2 (Runtime): Runs only the ready-to-serve build files.
This approach keeps the final image small, secure, and fast because we discard all the heavy development files (like source code and dev dependencies) before the final image is created.
Best practices for Docker builds:
-
Use lightweight base images like
node:alpine. -
Copy only necessary files between stages.
-
Use a
.dockerignorefile to skip unnecessary folders likenode_modulesor local logs.
Breaking Down the Dockerfile
For this guide, let’s assume we are deploying a standard Node.js/React application. The flow is simple: we have a package.json, we run npm install, and then npm run build to generate a static folder. That build folder is what we serve.
Here is how the Dockerfile looks, split into two stages:
Stage 1 — Builder Stage
FROM node:22-alpine AS builderofproject


WORKDIR /project


COPY package.json package-lock.json ./


RUN npm install


COPY . .


RUN npm run build
what’s happening here:
-
We start with a lightweight Node.js image and name this stage
builderofproject. -
We copy
package.jsonbefore the source code. This allows Docker to cache the “install dependencies” layer. If you only change your code but not your dependencies, Docker skips the install step, making builds much faster. -
Finally
-
npm run buildcompiles the app into a production-ready folder.
Stage 2 — Runtime Stage
FROM node:22-alpine

WORKDIR /project

COPY --from=builderofproject /project/build /project/build

RUN npm install -g serve

EXPOSE 3000

CMD ["sh", "-c", "serve -s build -l 3000"]
The result: We copy only the build folder from the previous stage, leaving behind the source code and heavy node_modules. We expose port 3000 and use the serve command to host the application. This results in a compact, secure image.
Google Cloud Prerequisites
Now that our application is ready, let’s prepare the Google Cloud environment.
1. Project Setup:
-
Create or select a GCP project.
-
Important: Note down your Project ID, as we will use it in the GitLab pipeline.
-
Enable Billing.
-
For a full ‘before you begin’ checklist from Google Cloud, you can refer to the official guide
2. Enable Required APIs: Search for “Enabled APIs & Services” in the GCP console and enable the following:
-
Artifact Registry API
-
Cloud Build API
-
Cloud Run API

3. Create an Artifact Registry: This is where your Docker images will be stored.
-
Search for “Artifact Registry”.
-
Click + Create Repository.
-
Choose “Docker” as the format and select a region.

4. Service Account (The Pipeline’s Identity): GitLab needs a way to talk to Google Cloud securely. We do this using a Service Account (think of it as a “bot” user).
-
Go to IAM & Admin > Service Accounts > + Create Service Account.
-
Assign the following roles to ensure the pipeline has permission to build and deploy:
-
Artifact Registry Writer (To push images)
-
Cloud Build Editor (To execute builds)
-
Cloud Run Admin (To update the service)
-
Service Account User (To act as the service account)
-
-
For detailed steps on creating service accounts, you can follow the official guide
-
If you want to see the exact predefined roles and permissions, you can refer to the official IAM documentation: Cloud Run IAM roles , Artifact Registry access control and IAM , General IAM roles and permissions index
5. Generate the Key:
-
Go to your new Service Account → Keys → Add Key → Create New Key → JSON.
-
Download the JSON file. This is your authentication credential.
-
You can refer this official doc for more detail
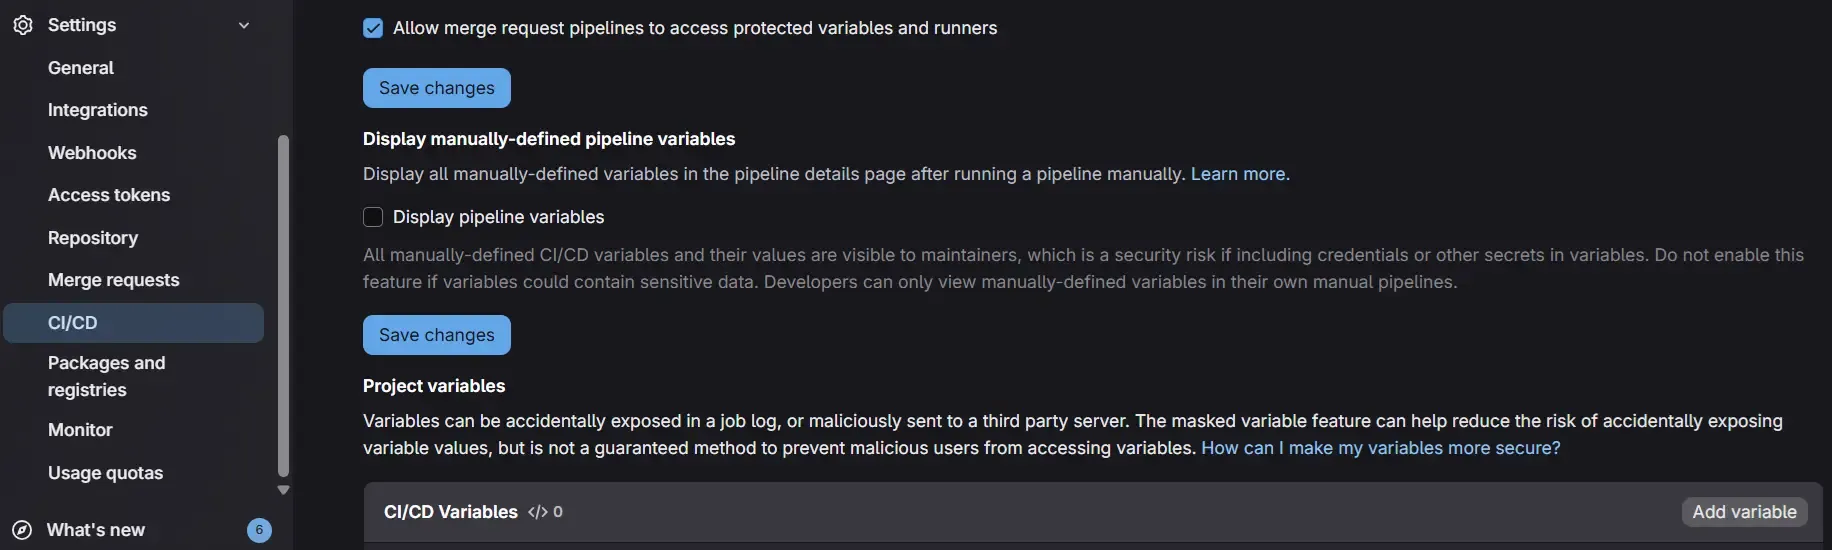
6. Store Secrets in GitLab: Never commit keys to your code. instead:
-
Go to your GitLab Repo → Settings → CI/CD → Variables.
-
Add a variable named GCLOUD_SERVICE_KEY.
-
Paste the content of the JSON key file.
-
Crucial: Mark it as Protected and Masked to keep it safe.
GitLab CI/CD Pipeline
Now for the main event—automating the process with .gitlab-ci.yml.
Basic Structure
A GitLab pipeline consists of stages and jobs. For simplicity, we will focus on the deploy stage, but you can easily add test or build stages later.
Development and Production Pipelines
We’ll create two jobs:
-
deploy-dev — runs automatically when pushing to the development branch.
-
deploy-prod — runs manually for production from the main branch.
Step-by-Step: The Development Job
deploy-dev:
    stage: deploy
    environment: dev
    image: google/cloud-sdk:latest
    script:
        - echo "$GCLOUD_SERVICE_KEY" | tr -d '\r' > gcloud-key.json
        - gcloud auth activate-service-account --key-file=gcloud-key.json
        - gcloud config set project PROJECT_ID
        - gcloud builds submit --tag LOCATION-docker.pkg.dev/REPO/IMAGE:dev-$CI_COMMIT_SHORT_SHA .
        - gcloud run services update SERVICE_NAME --image=LOCATION-docker.pkg.dev/REPO/IMAGE:dev-$CI_COMMIT_SHORT_SHA --region=REGION
    only: - development
Let’s decode the script:
-
tr -d '\r': This command cleans up the variable. Sometimes, copy-pasting keys introduces invisible “carriage return” characters that break authentication; this ensures the key file is valid. -
gcloud auth activate-service-account: Logs the pipeline into Google Cloud using the key we saved. -
gcloud builds submit: This is where the magic happens. Instead of building Docker locally, we send the context to Google Cloud Build.- The tag
:dev-$CI_COMMIT_SHORT_SHAappends the unique commit hash to the image. This makes debugging easy—you know exactly which code commit corresponds to which running container.
- The tag
-
gcloud run services update: Updates the existing Cloud Run service with the new image.- Note: If you are deploying for the first time, use
gcloud run deployinstead, or manually create the service in the GCP console first and select “Deploy one revision from an existing container image.”
- Note: If you are deploying for the first time, use
Production Pipeline
Production deployment looks almost identical but adds safety checks and other considerations mentioned below
-
when: manual: This adds a “Play” button in GitLab. The pipeline pauses here until a human approves the deployment. This gives the team time to review changes. -
Deploy only from protected branches like main or release.
-
SemVer Tagging: In a real-world scenario, you should tag production images with version numbers (e.g.,
v1.0.0) rather than just commit hashes. -
Review code before merging into main.
This ensures that production deployments are deliberate, reviewed, and traceable.
Two Deployment Approaches
There are two main ways to build and deploy from GitLab to GCP.
Approach 1 — Using gcloud Commands (Recommended)
This is what we used above (gcloud builds submit).
-
Pros: It offloads the work to Google’s infrastructure, leverages aggressive caching, and is very simple to set up.
-
Cons: You have slightly less control than running raw Docker commands.
Approach 2 — Using Docker Commands Inside CI
In this method, the GitLab runner itself executes docker build and docker push.
-
Flow: Authenticate Docker ->
docker build->docker push->gcloud run deploy. -
Pros: rigorous control over the build process.
-
Cons: Requires “Privileged Runners” (Docker-in-Docker), which can be slower and more resource-intensive on GitLab.
Verdict: For most teams, Approach 1 (gcloud) is superior due to cost, performance, and simplicity.
Alternative Approach — Cloud Build Triggers
Let’s talk about another route — Cloud Build Triggers.
Instead of GitLab pushing deployments, Google Cloud can watch your repository and deploy automatically whenever you push new code.
Simple analogy:
GitLab CI/CD = You call a cab when you need a ride.
Cloud Build Trigger = A self-driving car that picks you up automatically.
Setting Up Cloud Build Trigger (Step-by-Step)
To set up a Cloud Build Trigger, follow these steps carefully:
-
Select your project in the Google Cloud Console.
-
In the search bar, type “Cloud Build” and open it.
-
From the left sidebar, go to Repositories → 2nd Gen → Create Host Connection.
-
Choose GitLab from the available options on the left.
-
Enter your GitLab credentials and authorize access.
-
After connecting, go back one step and open Link Repository (2nd Gen).
-
Select your host and the repository you want to link.
- Once linked successfully, your GitLab repository will appear under connected repositories.
-
Next, navigate to Triggers and click Create Trigger.
-
Choose the linked repository from the 2nd Gen list.
-
Configure the trigger settings (branch, build steps, trigger conditions, etc.) based on your requirements.
-
-
Finally, create a
cloudbuild.yamlfile in your repository to define the build and deploy steps. For the exact structure and examples, you can refer to the official Cloud Build docs: Create and manage build triggers & Basic build configuration
For example you can build cloudbuild.yaml file like below:
steps:

   # Build image
   - name: 'gcr.io/cloud-builders/docker'
   args: ['build', '-t', 'LOCATION-docker.pkg.dev/$PROJECT_ID/REPO_NAME/IMAGE_NAME:$SHORT_SHA', '.']

   # Push image
   - name: 'gcr.io/cloud-builders/docker'
       args: ['push', 'LOCATION-docker.pkg.dev/$PROJECT_ID/REPO_NAME/IMAGE_NAME:$SHORT_SHA']

   # Deploy to Cloud Run
   - name: 'gcr.io/cloud-builders/gcloud'
       args: ['run', 'deploy', 'SERVICE_NAME', '--image', 'LOCATION-docker.pkg.dev/$PROJECT_ID/REPO_NAME/IMAGE_NAME:$SHORT_SHA', '--region', 'LOCATION']

   images:
   - 'LOCATION-docker.pkg.dev/$PROJECT_ID/REPO_NAME/IMAGE_NAME:$SHORT_SHA'
Cloud Build will now handle everything automatically — build, push, and deploy.
When to use this:
-
Your app is fully hosted on GCP.
-
You prefer a lighter CI/CD setup without manual steps.
-
Ideal for smaller projects or quick prototypes.
Testing Tips
Before merging your pipeline code, don’t guess—verify. Create a local script file (e.g., deploy-test.sh). Copy the commands from the script: section of your YAML file and replace the variables with real values. Run this script locally on your terminal.
-
This verifies that your Service Account key works.
-
It ensures the
gcloudcommands are correct. -
It saves you from a dozen “Fix CI/CD” commits in your git history.
Conclusion
You’ve now seen how to build a complete, automated deployment pipeline. To recap:
-
Dockerfile: Use multi-stage builds for efficiency.
-
GCP Setup: Ensure Artifact Registry and IAM roles are correctly configured.
-
GitLab CI/CD: Use
gcloud builds submitfor a smooth build process. -
Security: Always protect your keys using GitLab Variables.
With this foundation, you can stop worrying about deployments and focus on what matters most: writing great code.