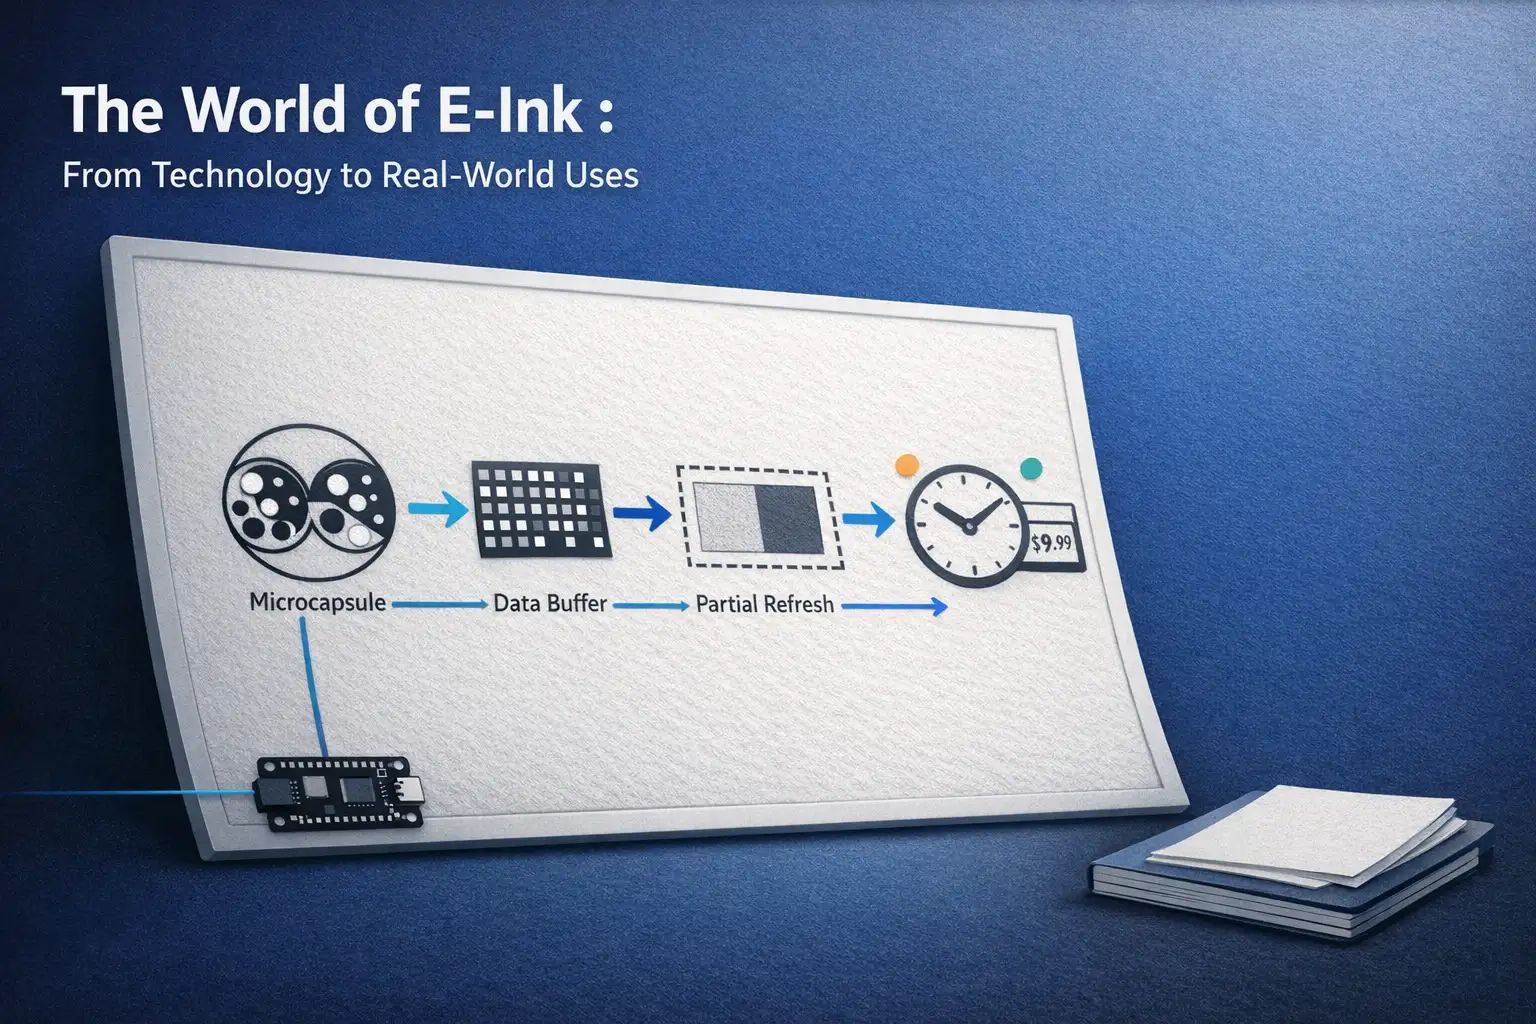
The World of E-Ink : From Technology to Real-World Uses
What is E-Ink?
Have you ever picked up an e-reader like a Kindle or Kobo and thought, “Wow, this really feels like paper!”? You’re not imagining things! The secret behind that comfortable reading experience is a fascinating technology called E-Ink.
E-Ink displays are a clever kind of screen that look and feel a lot like real paper. This is their superpower! Unlike the bright, glowing screens of your smartphone or tablet, E-Ink doesn’t shine light at your eyes. Instead, it bounces back ambient light, mimicking a printed book.
The Magic Behind Your Favorite E-Reader!
This makes them super easy on the eyes, just like flipping through a book, and they don’t have the glare or glow of regular screens that can tire you out. Think about trying to read your phone in bright sunshine – nearly impossible, right? E-Ink screens don’t glare and hence are very good for outdoor reading similar to reading physical books. This gentle reflection is a huge reason why you can read for hours on an e-reader without experiencing the eye strain often associated with traditional digital displays.
Found in e-readers like the Kindle or Kobo, E-Ink screens make digital displays look like paper. But how do they actually create those sharp words and images? It all comes down to microscopic technology. Tiny charged particles create clear text or images. Imagine millions of tiny, colored spheres (usually black and white) inside the screen. When an electric charge is applied, these little spheres move around to form the letters and pictures you see.
One of the great things about E-Ink is that it is power efficient. These images stay without using power. That’s right! Once formed, text or images stay intact without continuous power. Power is only used when we “turn the page” or update the screen. This is why e-readers boast incredible battery life, often lasting for weeks on a single charge – a dream come true for avid readers!
While the most common E-Ink displays are in classic black and white, giving that authentic newspaper or book feel, E-Ink can be grayscale or have a bit of color. Newer advancements are bringing more vibrant colors to E-Ink, opening up new possibilities beyond just reading.
Ultimately, it feels like reading a real book but with digital benefits. You get the comfortable, natural reading experience of paper combined with the convenience of carrying thousands of books in one lightweight device. Pretty amazing, right?
Working Principle: The Microcapsule Magic
E-Ink’s two-particle electronic ink system is made up of millions of tiny microcapsules. Each microcapsule contains negatively charged white particles and positively charged black particles suspended in a clear fluid. When a positive or negative electric field is applied, corresponding particles move to the top of the microcapsule where they become visible to the viewer. This makes the surface appear white or black at that spot as shown below.
Key Features of E-Ink Displays
Let’s quickly recap what makes E-Ink so special:
- Paperlike Display:
- Non-backlit, reflects ambient light like paper
- Easier on the eyes, especially in bright sunlight
- Low Power Consumption:
- Uses power only when changing the screen (e.g., turning a page)
- Devices can go weeks on a single charge
- Bistable Technology:
- Each pixel stays in place without power until it needs to be changed
- Readability:
- High contrast (black and white, now with multicolor options)
- No glare like LCD or OLED screens
Getting Started with E-Ink Displays: Our Hands-On Journey!
We were so intrigued by E-Ink that we had to get our hands dirty with actual implementation. To kick things off and better understand these displays, we started with one that was easily available.
Our First E-Ink Project: The 5.83” Good Display EPD
Our chosen canvas for this dive into E-Ink was the GDEY0583T81. This isn’t just any screen; it’s a TFT active matrix electrophoretic display, meaning it’s a sophisticated E-Ink panel built for clear, paper-like visuals.
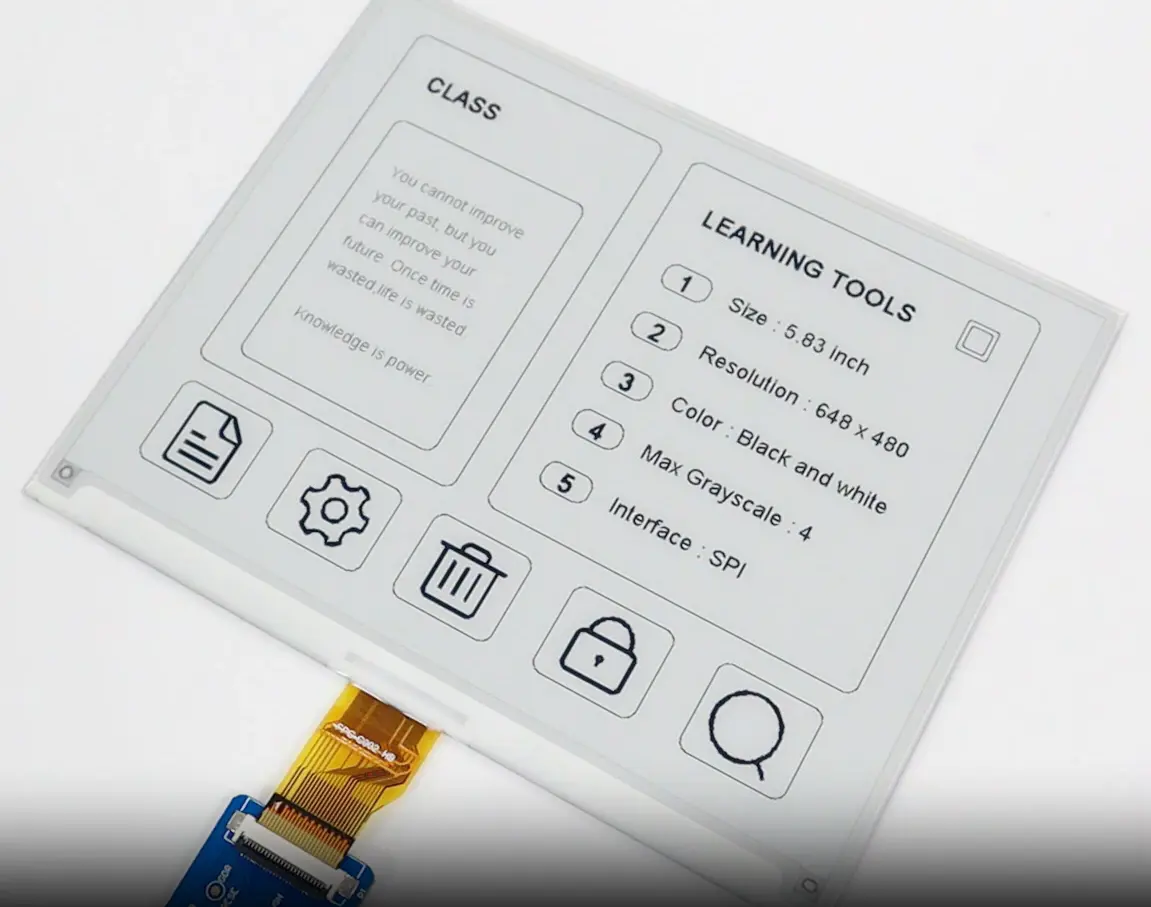
ePaper Display’s Basic Parameters
- Product size: 5.83 inch
- Resolution: 648x480
- PPI: 138.32
- Color: Black and White
- Driver IC: UC8179
- Interface: SPI
- Operating voltage: 3.3V
- Operating temperature: 0-50 ℃
ePaper Display’s Main Features
- Bi-stable display (retains content after power outage)
- Pure reflection display mode
- Wide viewing angle (>170°)
- Hard-coated for anti-glare
- No power consumption when not refreshing
- No blue light emission, zero radiation
Reference Links
- GDEY0583T81
- E-Paper Driver HAT
- 5.83inch e-Paper HAT Manual – Waveshare Wiki
- E-Paper ESP8266 Driver Board – Waveshare Wiki
Demo 1: Building an Analog Clock with ESP8266
Our very first step into the E-Ink world involved creating an analog clock. We explored various example codes and aimed to update the screen efficiently.
This display uses the SPI protocol and its driver IC (UC8179) takes an image buffer via SPI, then uses a command to refresh the display. Our initial goal was to update an analog clock at 1Hz (once per second). We ended up achieving 2Hz performance in this demo.
We designed a background image of the clock and focused on rotating the second hand from a fixed position. Here’s a glimpse of the C code logic for updating the second hand:
// Updates the second hand position based on the current tick.
// tick: Current tick (0–119, mapped to 0°–357° at 3° per tick).
// each tick takes approx 500ms so in a minute it would do 120 ticks
void UpdateSecondHand(int tick)
{
  if (tick != prev_tick)
  {
    // Erase old second hand.
    DrawLine(CENTER_X, CENTER_Y, x1_old, y1_old, 0); // 0 = OFF

    // Calculate new endpoint using precomputed tables.
    int x1 = CENTER_X + static_cast<int>(HAND_LENGTH * COS_TABLE[tick]);
    int y1 = CENTER_Y + static_cast<int>(HAND_LENGTH * SINE_TABLE[tick]);

    // Draw new second hand.
    DrawLine(CENTER_X, CENTER_Y, x1, y1, 1); // 1 = ON

    // Update state.
    x1_old = x1;
    y1_old = y1;
    prev_tick = tick;

    // Update partial display region.
    UpdateMatrix(tick);
  }
}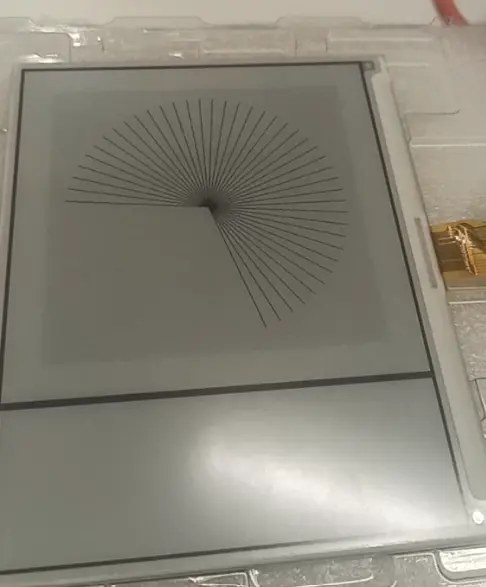
Testing second hand update
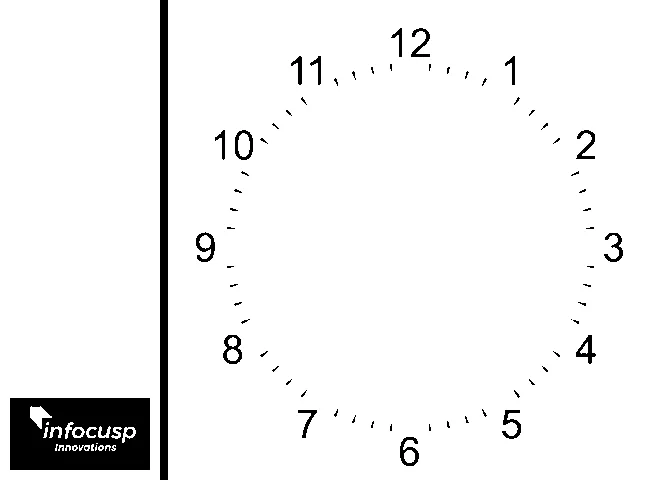
Background Image for the clock
Challenges and Optimizations: Speeding Things Up!
A significant hurdle we faced was with the Waveshare demo code’s SPI implementation. It used software-based SPI by bit-banging GPIOs using digitalWrite(), resulting in speeds less than 2MHz. This caused considerable latency when transmitting the full image (648x480) or even a partial clock window (400x400).
To overcome this, we modified the GPIO operations to use direct register writes. This dramatically improved the transmission speed. The latency for a full window update dropped to less than 20ms – that’s over 10x faster!
Here’s the optimized SPI transfer callback:
#define SET_PIN(pin)   (GPOS = (1 << (pin)))  // Set pin high
#define CLEAR_PIN(pin) (GPOC = (1 << (pin)))  // Set pin low
void EpdSpiTransferCallback(byte data)
{
    CLEAR_PIN(CS_PIN);  // CS low
    for (int i = 0; i < 8; i++)
    {
        if (data & 0x80) SET_PIN(PIN_SPI_DIN);
        else             CLEAR_PIN(PIN_SPI_DIN);
        data <<= 1;
        SET_PIN(PIN_SPI_SCK);    // Clock high
        CLEAR_PIN(PIN_SPI_SCK);  // Clock low
    }
    SET_PIN(CS_PIN);  // CS high
}
Demo 2: Analog Clock using Raspberry Pi 4 B
Given the ESP8266’s limited memory and processing power, we decided to port our analog clock application to the more powerful Raspberry Pi 4 B.
We checked example codes from Waveshare in both C and Python. Our first move was to increase the SPI baud rate to 20MHz and test their example application. We then updated the example Python script for our specific use case, removing all unnecessary code.
This module now efficiently initializes the e-Paper display, draws a clean analog clock with hour, minute, and second hands, and overlays a digital time display for a modern touch. It leverages the Waveshare EPD library for display control and PIL for image processing.
We also added a digital clock using a font library to ensure perfect synchronization with the analog clock on the same screen.
The key pin definitions and SPI setup used are as follows:
## Pin definition
RST_PIN = 17
DC_PIN = 25
CS_PIN = 8
BUSY_PIN = 24
PWR_PIN = 18
MOSI_PIN = 10
SCLK_PIN = 11

## SPI Configuration
# SPI device, bus = 0, device = 0
self.SPI.open(0, 0)
self.SPI.max_speed_hz = 20000000
self.SPI.mode = 0b00
The core logic for drawing and updating the clock:
    def _draw_clock(self, img, hour, minute, second):
        """Draws an analog clock face with hour, minute, and second hands.
        """
        # Draw Hour hand
        hour_angle = math.radians((hour % 12 + minute / 60) * 30)
        self._draw_hand(img, self.radius * 0.5, hour_angle, 6)

        # Draw Minute hand
        minute_angle = math.radians(minute * 6)
        self._draw_hand(img, self.radius * 0.7, minute_angle, 4)

        # Draw Second hand
        second_angle = math.radians(second * 6)
        self._draw_hand(img, self.radius * 0.9, second_angle, 2)

        # Add time text
        img.text(
            ClockFaceConstants.DigitalTimeLoc,
            f"{hour:02d}:{minute:02d}:{int(second):02d}",
            font=self.font,
            fill=0
        )
        return img
Rpi analog clock with digital time update
Rpi Demo 1 Analog clock 1hz
Demo 3: Implementing a Screen Monitor using RPi 4 B
At this point, we realized the potential for diverse applications and efficient display logic. We aimed to create a screen monitor that could display any content from the Raspberry Pi’s main display onto our E-Ink screen.
The challenge here is that the Raspberry Pi’s native display is colored and has a different resolution. So, our process involved several steps:
- Capture the raw screen content.
- Resize it to our E-Ink display’s dimensions (648x480).
- Convert it to grayscale/monochrome (with dithering for better visual quality).
- Update the buffer to numpy array and send it to the E-Ink display.
Using Python, we leveraged various image processing libraries. We created functions to capture the screen, convert it to grayscale, and display it. We used the Waveshare EPD library for display control, PIL for general image processing, OpenCV for quick image transformations, and a custom lookup table (LUT) for efficient RGB565 to grayscale conversion.
Each frame took nearly 600ms to process and update. We add a manual delay to have a 1Hz refresh rate for our demo. We showcased the setup by playing a YouTube analog clock (to see the sync) and demonstrated typing output directly onto the E-Ink display. The goal was to mimic the actual screen output of the Raspberry Pi.
Here’s some of the Python code involved:
  # Framebuffer constants
  FB_DEVICE = "/dev/fb0"
  FBIOGET_VSCREENINFO = 0x4600
  LUT = None  # Initialized in create_lut()

  def get_framebuffer_info():
      """Retrieves resolution and bit depth from the framebuffer device.
      Returns:
          Tuple of (width, height, bits_per_pixel) for the framebuffer.
      Raises:
          IOError: If the framebuffer device cannot be accessed.
      """
      with open(FramebufferConstants.FBDevice, "rb") as fb:
          vinfo = fcntl.ioctl(fb.fileno(), FramebufferConstants.FBIOGetVScreenInfo, b"\x00" * 40)
          # struct returns xres, yres, xres_virtual, yres_virtual, xoffset, yoffset, bpp (bits_per_pixel)
          xres, yres, _, _, _, _, bpp = struct.unpack("IIIIIII", vinfo[:28])
return xres, yres, bpp- Created LUT(Look Up Table) for fast conversion of input buffer (in RGB565 format) to grayscale
  def _create_lut(self):
      """Creates a lookup table for converting 16-bit RGB565 pixels to 8-bit grayscale.
      Generates a NumPy array mapping all possible RGB565 values (0 to 65535) to grayscale
      values (0 to 255) using the luminance formula: Y = (77*R + 150*G + 29*B) >> 8, where
      R, G, and B are scaled to 8-bit values from 5-bit red, 6-bit green, and 5-bit blue
      components, respectively. The LUT is used for efficient framebuffer conversions.
      """
      lut = np.zeros(65536, dtype=np.uint8)
      for pixel in range(65536):
          r = ((pixel >> 11) & 0x1F) << 3  # 5-bit red to 8-bit
          g = ((pixel >> 5) & 0x3F) << 2   # 6-bit green to 8-bit
          b = (pixel & 0x1F) << 3          # 5-bit blue to 8-bit
          lut[pixel] = (77 * r + 150 * g + 29 * b) >> 8  # Integer luminance
return lut- Write method for capturing screen and using above methods:
  def get_frame(self):
      """Captures the framebuffer and returns a binary NumPy array for the GDEY0583T81 e-Paper display.

      Reads the framebuffer in 16-bit RGB565 format, converts it to grayscale using a precomputed
      lookup table (LUT mapping uint16 RGB565 to uint8 grayscale), resizes to 648x480 pixels
      using Lanczos interpolation, and applies Otsu's thresholding with maxval=1 to produce
      a binary array with values 0 (black) and 1 (white).
      """

      logging.info("Capturing framebuffer...")
      try:
          width, height, bpp = self._get_framebuffer_info()
          logging.info(f"Resolution: {width}x{height}, Bits per pixel: {bpp}")

          if bpp != 16:
              raise ValueError(f"Expected 16-bit RGB565, got {bpp} bits per pixel")

          bytes_per_pixel = bpp // 8
          buffer_size = width * height * bytes_per_pixel

          with open(FramebufferConstants.FBDevice, "rb") as fb:
              raw_data = fb.read(buffer_size)
          logging.info("Converting RGB565 to grayscale...")

          gray = self.LUT[np.frombuffer(raw_data, dtype=np.uint16)].reshape(height, width)
          logging.info("Snapshot taken and processing image...")

          resized = cv2.resize(gray, DisplayRes.GDEY0583T81, interpolation=cv2.INTER_LANCZOS4)
          logging.info("Resized to 648x480... applying binary conversion...")

          # Apply Otsu's thresholding for binary conversion | set 0 for black & 1 for white
          _, binary = cv2.threshold(resized, 0, 1, cv2.THRESH_BINARY + cv2.THRESH_OTSU)
          logging.info("Binary conversion completed")
          return binary

      except (IOError, ValueError) as e:
              logging.error(f"Error capturing framebuffer: {e}")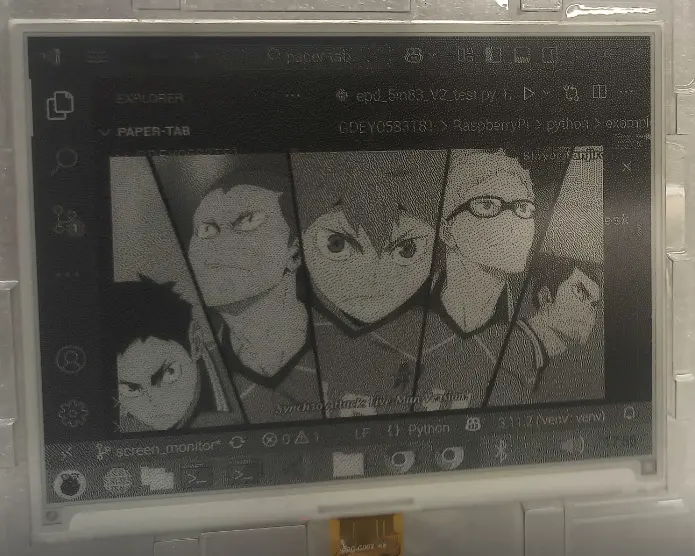
Screen monitor output with dithering
Rpi Screen Monitor clock + typing demo
Community and Craft
The E-Ink community is vibrant and full of incredible open-source projects! Here are some notable GitHub repositories and resources that are pushing the boundaries of E-Paper displays:
| Repo | Notes |
|---|---|
| GxEPD2 | Arduino Display Library for SPI E-Paper Displays |
| Waveshare e-Paper | Waveshare repository for their e-Paper displays |
| ESP32epd GoodDisplay | Good Display Repository for their e-Paper displays |
| FastEPD | Optimized library for driving parallel eink displays with the ESP32 |
| CalEPD | Epaper ESP-IDF component with GFX capabilities and multi SPI support |
| EPDIY | EPDiy is a driver board for affordable e-Paper (or E-ink) displays |
| Inkycal | Inykcal is a software written in python for selected E-Paper displays. It converts these displays into useful information dashboards. |
| NekoCal | A simple calendar using EPD (E-ink) as display based on STM32 microcontroller |
| Glider | Open-source E-ink monitor. Mirror of https://gitlab.com/zephray/glider |
| ice40_E-ink | ice40 FPGA eink controller |
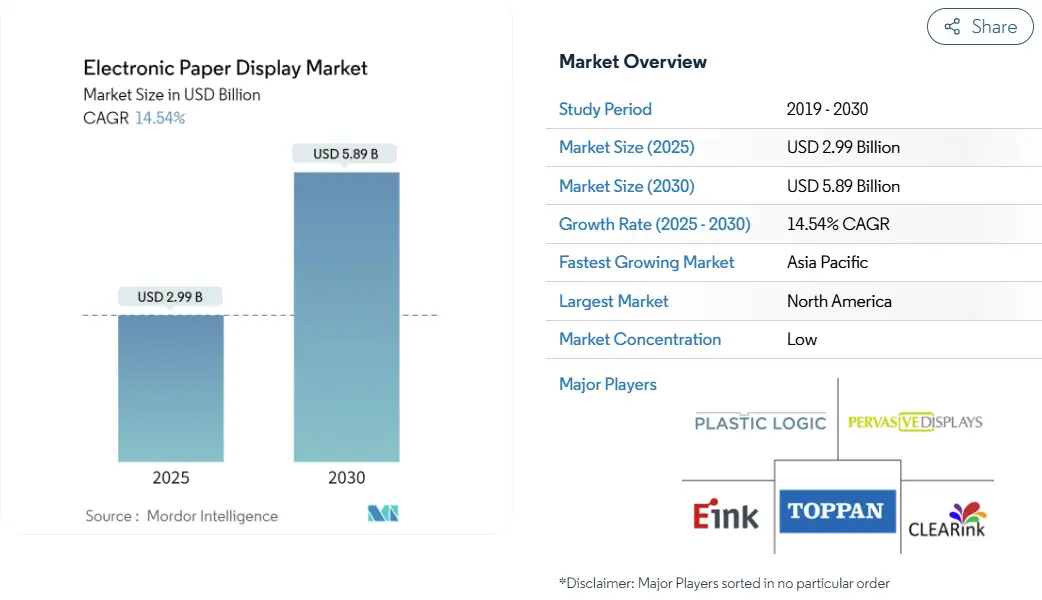
Market and Applications
Applications:
- Reading & Writing – easy on the eyes
- eReader
- eNote (Kindle, reMarkable, KOReader, B00X Tablet, PineNote, Bigme, Huawei MatePad)
- Education – easy on the eyes
- eNote
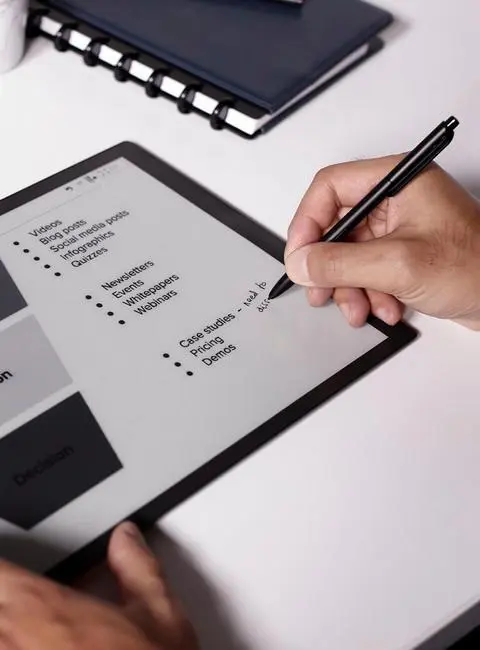
- Interactive Whiteboards and e-writers
- Business & Office – efficiency improvement
- Digital Paper
- Meeting Room Sign
- Laptop
- Monitor
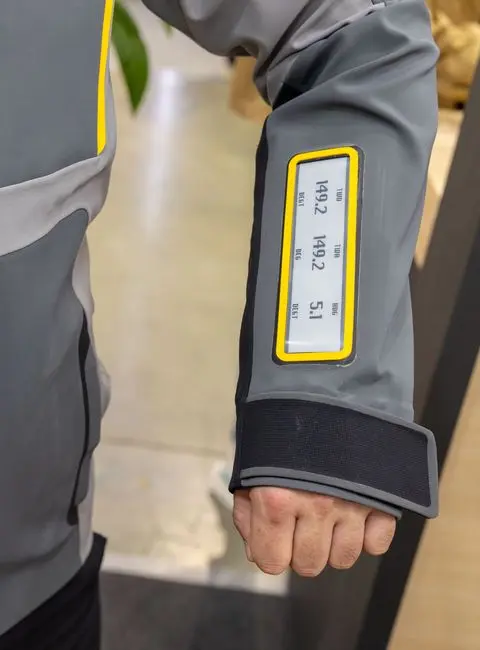
- Mobile & Wearables – sunlight readable
- Phone/Phone case
- Wearables (Smart watch, bracelet, clothes)
- Retail – efficiency improvement
- Electronic Shelf Label (Dynamic Pricing Ability)
- POP Sign
- Digital Out-of-Home (DOOH) – Dynamic Advertising Ability
- Logistics & Factory – low power consumption
- Logistics and Factory Tag
- Logistics Box
- Healthcare & Hospital – reflective and no emissive light
- Patient Room Door / Patient Care Sign
- Patient Communication Board
- Digital Notepad
- Smart Badge
- Transportation & Outdoor – low power consumption
- Public Transportation Sign
- Public Information Display
- Digital Out-of-Home (DOOH) – Dynamic Advertising Ability
- In-Vehicle Display
- Automotive – reflective, dynamic
- Car Body
- License Plates
- Innovative Design – smart and green
- Photo Frame
- E-ink Calendar
| eReader/ Tablets | Healthcare | Electronic Shelf Label | Digital Signage | Wearables |
|---|---|---|---|---|
 | 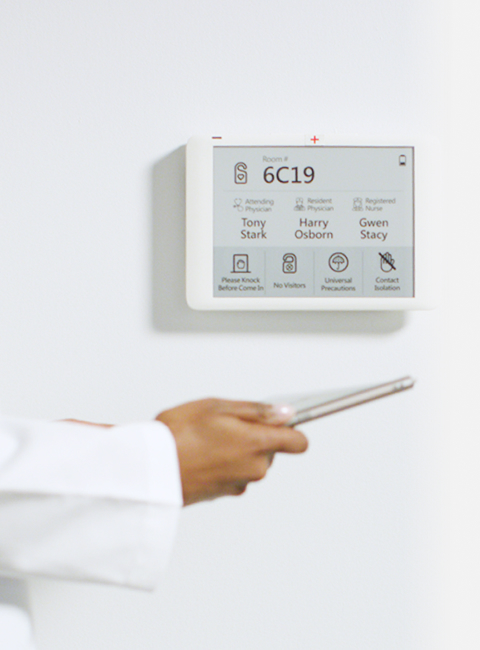 | 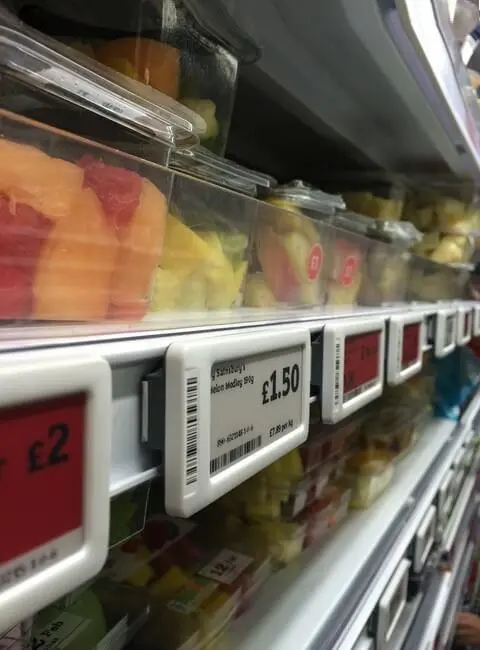 | 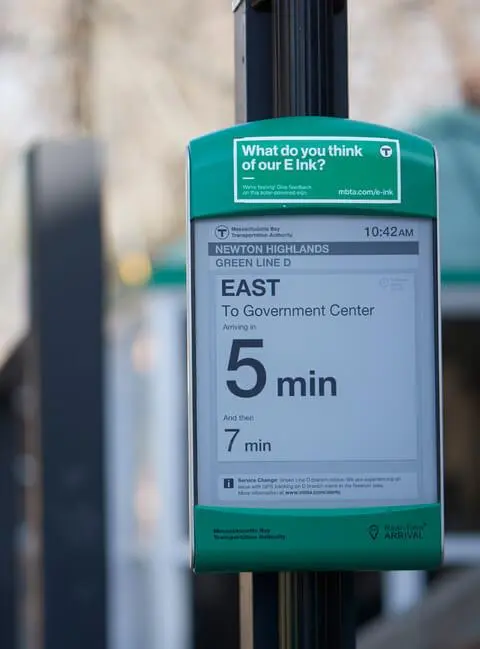 |  |
(Source: https://www.eink.com/application, image copyright Eink corporation)
Next Steps: Pushing the Boundaries
We are eagerly looking forward to deep diving into parallel-based displays for even faster update rates and greater control over screen driving. We’re actively exploring the driving mechanisms of parallel port displays for full and partial updates, waveform generation, and optimizations for image processing.
We are currently looking at multiple options for E-Ink Controller (eTC) and driver boards for parallel screens, including:
- Modos Paper Monitor (FPGA based)
- EPDiy7 (ESP32-S3 based open source board)
- RK3576 board
- PineNote (RK3566 chip used)
Conclusion: E-Ink’s Bright Future
The continuous drive for faster, larger, and more robust devices fuels technological progress, enhancing capabilities across various domains. At the same time, prioritizing user comfort and simplicity is critical. That’s precisely where E-Ink technology comes into the picture, offering a practical balance of performance and ease of use. As technological advancements continue, E-Ink is poised for further refinements, expanding its potential across diverse applications. We are genuinely excited to deep dive into this technology and contribute to its evolution!
References and additional resources:
https://github.com/Modos-Labs/Glider?tab=readme-ov-file
https://essentialscrap.com/eink/index.html
Driver-comparison-of-itc-and-etc-41
otp-and-waveform-files-in-e-paper-displays-how-they-drive-your-screen
E-Paper_Floyd-Steinberg
5.83inch_e-Paper_HAT_Manual
E-Paper_ESP8266_Driver_Board
https://pine64.org/devices/pinenote/
E-Paper Display | awesome-embedded-display
https://docs.pervasivedisplays.com/epd-overview/what-is-epaper
Supercon 2024: Wenting Zhang - Making E-Ink Go Fast
https://tomorrowdesk.com/method/e-paper-display
https://illumin.usc.edu/e-ink-technology-the-secret-behind-kindle/