
Setting Up Azure Key Vault in .NET Application
Setting Up Azure Key Vault in .NET Application
1. Brief Introduction to Azure Key Vault
Azure Key Vault
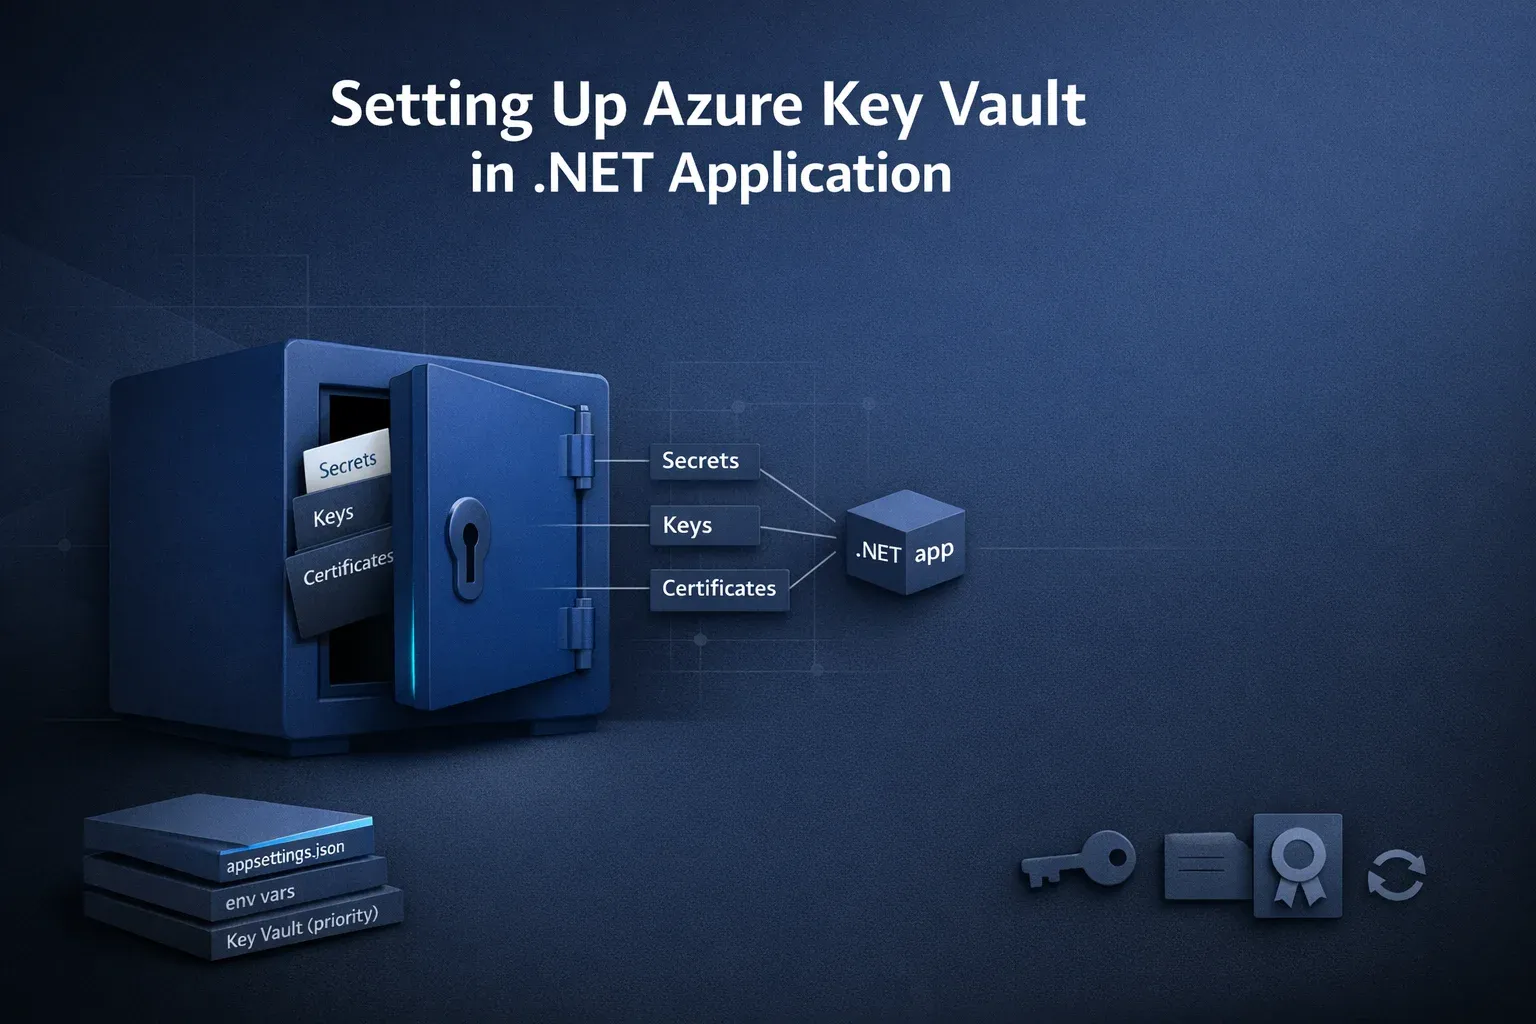
Azure Key Vault is a Microsoft Azure service designed to securely store and manage application secrets, keys, certificates, and other sensitive information.
Key Concepts
-
Keys - With Azure Key Vault, organizations can generate, store and maintain encryption keys that support secure signing, decryption, and encryption processes.
-
Secrets encompass confidential data like connection strings, passwords, API keys, and various configuration specifics.
-
Certificates serve as digital credentials that ensure secure communication for applications.
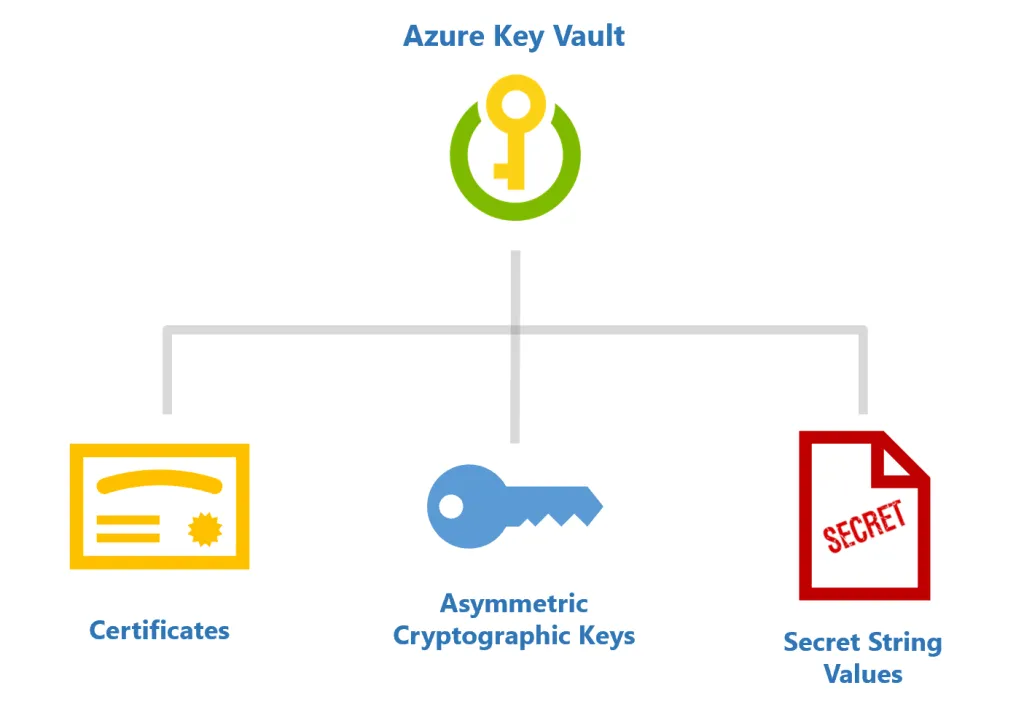 Figure 1: Illustrates that Azure Key Vault serves as a centralized solution for securing and managing three primary types of sensitive assets. The hierarchy branches from the main service at the top down to its three main capabilities: managing digital certificates, securing asymmetric cryptographic keys, and storing sensitive data as secret string values (such as API keys or passwords).
Why Azure Key Vault?
For Centralized Management, Enhanced Security, User-Friendly Interface, and Compliance Assurance.
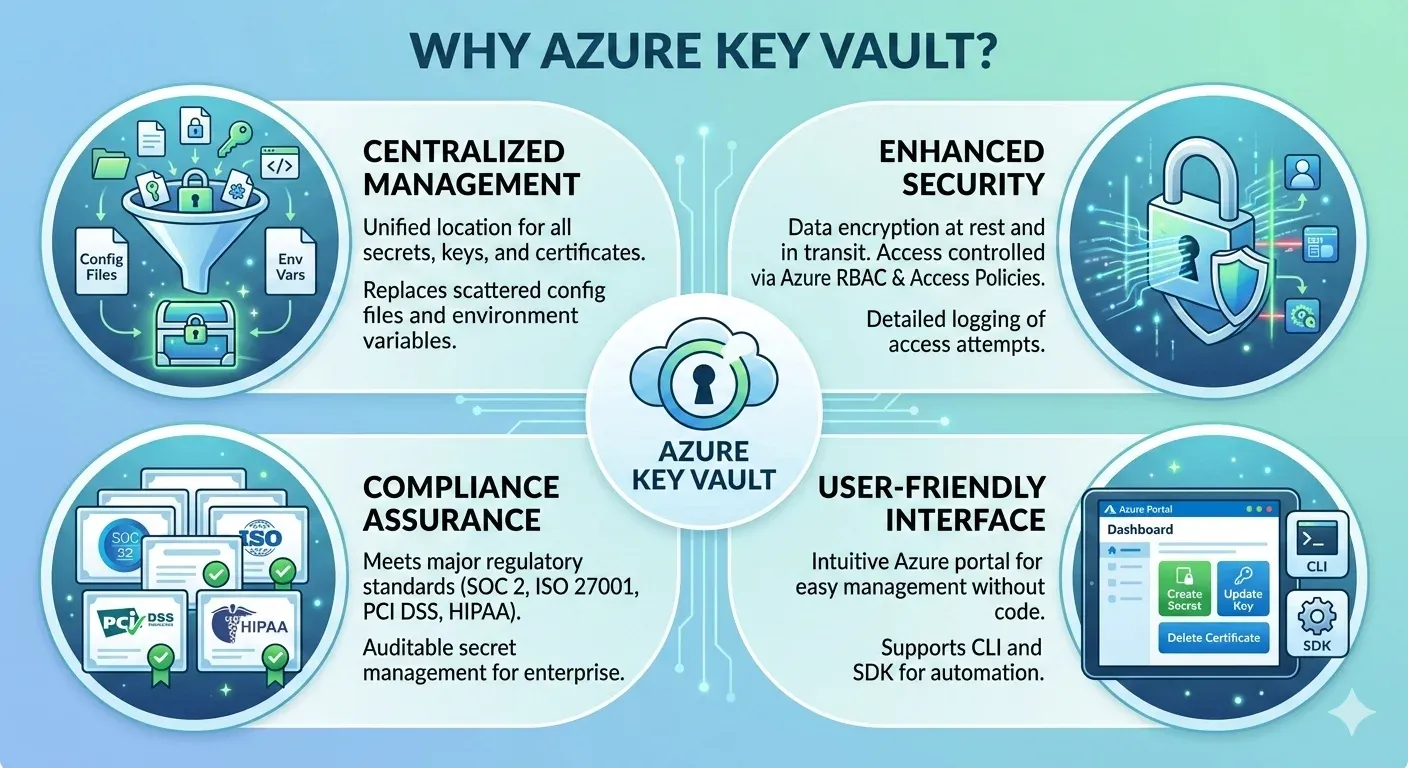 Figure 2: Shows that Azure Key Vault provides central management for secrets, strong security through encryption and access controls, compliance with standard regulations, and simple interfaces for users.
2. Prerequisites
-
An Azure account
-
Basic understanding of .NET development
-
Visual Studio or a .NET development environment
3. Step-by-Step Guide For Setting Up Azure Key Vault in .NET Application
Step 1. Create Azure Key Vault
-
Open Azure portal and Sign in.
-
Create a new Key Vault:
-
Click “Create a resource” and then search for “Key Vault.”
-
Click “Key Vault” and then click “Create.”
-
-
Provide the following information:
-
Subscription: Choose the appropriate Azure subscription (Free trial or pay-as-you-go)
-
Resource Group: Create new resource group or select existing one.
-
Name: Give a unique name for your key vault.
-
Region: Pick a region that is nearest to your application environment for optimal performance.
-
-
Click Review + Create and then Create.
-
Add Secrets into the key vault:
-
Under Objects > Secrets, click Generate/Import.
-
Add the Name and Secret value, then click Create.
Hierarchical Configuration in Azure
When working with nested configurations, such as those in appsettings.json, Azure uses double underscores (
__) to represent hierarchical sections. This is particularly useful when defining configurations in Azure App Service or environment variables.
For example, if yourappsettings.jsoncontains:{ "Section": { "Key": "Value" } }To represent this structure in Azure, the key name would be:
Section__Key = ValueThis approach preserves the configuration hierarchy, making it seamless to switch between
appsettings.jsonand Azure configurations.
-
Step 2. Create an Azure Application and Get Client ID & Client Secret for Your Local Project
-
Create and register a new application within Azure Active Directory:
-
Go to the Azure Portal.
-
Search for App registrations in the top middle search bar.
-
Click on New Registration to initiate the app creation process.
-
Name: Give your app a name.
-
Supported account types: Keep the default selected.
-
-
Get the Client ID:
-
After the successful registration, you will be redirected to the application’s Overview page.
-
The Application (client) ID will be displayed. This is the Client ID that your application will use to authenticate.
-
-
Create a Client Secret:
-
Open your registered app in the Azure Portal.
-
Under the Certificates & secrets section, select New Client Secret.
-
Provide a description (e.g., KeyVaultSecret) and set an expiration for the secret.
-
Click the Add button.
-
Once the client secret is generated, copy the secret value immediately and save it somewhere to use it in your application as you won’t be able to retrieve it later. This value is your Client Secret.
-
-
Assign Permissions to the Application:
-
To be able to access Azure Key Vault in the registered application, you must assign appropriate permissions.
-
Navigate to the Key Vault service in the Azure portal.
-
Under the Access policies, select + Add Access Policy.
-
Select the permissions for the secrets (e.g., Get, List etc.).
-
Under Select principal, search for the application you registered and select it.
-
Click Add to assign the policy.
-
Step 3. Install the Following NuGet Packages in Your .NET Project
To interact with Azure Key Vault from a .NET application, you need to install two official Microsoft NuGet packages:
-
Azure.Identity – Provides the credential classes (such as
ClientSecretCredentialandDefaultAzureCredential) used to authenticate your application with Azure services. -
Azure.Security.KeyVault.Secrets – The client library that allows your application to connect to Azure Key Vault and perform operations like retrieving, setting, and deleting secrets. For full details see Install the packages.
You can install both packages via the .NET CLI:
dotnet add package Azure.Identity
dotnet add package Azure.Security.KeyVault.Secrets
Step 4. Configure Key Vault Access in your .Net application
Create a configuration file (e.g., appsettings.json) to store your key vault information. Add the following information to the JSON:
{
  "KeyVaultConfig": {
    "KeyVaultUrl": "https://your-keyvault-name.vault.azure.net/",
    "TenantId": "your-tenant-id",
    "ClientId": "your-client-id",
    "ClientSecretId": "your-client-secret"
  }
}
Step 5. Retrieve Secrets from the Key Vault
Here’s a code example demonstrating how to retrieve a secret from Key Vault using Azure AD (Active Directory) authentication:
using System;
using Azure.Identity;
using Azure.Security.KeyVault.Secrets;

class Program
{
    static void Main(string[] args)
    {
        string keyVaultUrl = "https://{{your-keyvault-name.vault}}.azure.net/";
        string secretName = "your-secret-name";

        var credential = new ClientSecretCredential("your-tenant-id", "your-client-id", "your-client-secret");
        var client = new SecretClient(new Uri(keyVaultUrl), credential);

        KeyVaultSecret secret = client.GetSecret(secretName);
        Console.WriteLine($"Secret value: {secret.Value}");
    }
}
The expected output is the secret value that you stored in the key vault.
4. Integrating Key Vault Secrets in Web API
When running a Web API project, it’s often necessary to securely retrieve Azure keys from Azure Key Vault and integrate them with your application’s appsettings.json configuration. A common approach is to ensure that the Azure keys take precedence over values defined in appsettings.json. This can be achieved by configuring the application to merge Key Vault secrets into the configuration pipeline in Program.cs.
Here’s an example:
public static IHostBuilder CreateWebHostBuilder(string[] args) =>
    Host.CreateDefaultBuilder(args)
        .ConfigureAppConfiguration((context, config) =>
        {
            // Build the initial configuration to access KeyVault settings
            var builtConfiguration = config.Build();
            var keyVaultUrl = builtConfiguration["KeyVaultConfig:KeyVaultUrl"];

            // For local environment
            if (context.HostingEnvironment.IsEnvironment("Local"))
            {
                // Authenticate using client credentials for local development
                var tenantId = builtConfiguration["KeyVaultConfig:TenantId"];
                var clientId = builtConfiguration["KeyVaultConfig:ClientId"];
                var clientSecretId = builtConfiguration["KeyVaultConfig:ClientSecretId"];

                var credential = new ClientSecretCredential(tenantId, clientId, clientSecretId);
                var client = new SecretClient(new Uri(keyVaultUrl), credential);

                // Add Azure Key Vault secrets to configuration
                config.AddAzureKeyVault(client, new AzureKeyVaultConfigurationOptions());
            }
            else
            {
                // Use DefaultAzureCredential for non-local environments
                config.AddAzureKeyVault(new Uri(keyVaultUrl), credential: new DefaultAzureCredential());
            }
        });
This method ensures that values from Azure Key Vault take precedence over other configuration sources, enhancing both the flexibility and security of your application settings.
5. Additional Knowledge
Advanced Operation – Secret Caching for Performance
Directly calling Key Vault on application startup or every request is:
❌ Slow
❌ Expensive
❌ Unnecessary
Azure provides built-in caching via configuration:
Enable Caching in Program.cs
Install:
Azure.Extensions.AspNetCore.Configuration.SecretsThen add:
config.AddAzureKeyVault(
    new Uri(keyVaultUrl),
    credential,
    new AzureKeyVaultConfigurationOptions
    {
        ReloadInterval = TimeSpan.FromMinutes(15) // Auto-refresh secrets
    });
Benefits:
-
Faster startup
-
Fewer calls to Key Vault
-
Prevents throttling
-
Auto-updates secrets without restarting
Configuration Load Hierarchy (Important for Debugging)
.NET loads configuration sources in this order:
-
appsettings.json
-
appsettings.<Environment>.json
-
Environment variables (Azure App Service settings)
-
Azure Key Vault secrets (highest priority)
👉 This means Key Vault overrides everything else, which is expected behavior in cloud-native apps.
Security Best Practices
-
Use RBAC in place of Access Policies
-
Enable Soft Delete & Purge Protection
-
Rotate secrets regularly
-
Use Managed Identity in production
-
Add secret caching for performance
-
Monitor access using Azure Monitor
Advanced Access Control – Azure RBAC (Recommended)
Azure now recommends using Role-Based Access Control (RBAC) instead of traditional Access Policies.
Why RBAC?
-
More granular permissions
-
Works consistently across Azure services
-
Easier governance and automation
-
Supports least-privilege design
Common RBAC roles:
-
Key Vault Secrets User
-
Key Vault Reader
-
Key Vault Administrator
💡 You can still keep Access Policies (shown later), but RBAC is the preferred modern approach.
Managed Identity
a) Managed Identity for Hosted Applications
You can use a managed identity to authenticate your application to Key Vault without requiring explicit credentials. A Managed Identity is a security principle that Azure automatically provisions for Azure resources. It provides a secure and convenient way to authenticate to other Azure services, including Azure Key Vault, without requiring explicit credentials.
b) Types of Managed Identity
-
System-assigned Managed Identity:
-
Assigned to a specific Azure resource (like a VM, App Service, etc.).
-
Automatically created when you enable the identity on the resource.
-
Deleted when the resource is deleted.
-
-
User-assigned Managed Identity:
-
Created independently and can be assigned to multiple resources.
-
More flexible but requires additional management.
-
c) Using Managed Identity with Azure Key Vault
-
Enable Managed Identity on Your Resource:
-
Navigate to your App Service in the Azure portal.
-
Go to Settings > Identity in the left panel and enable System-assigned Identity.
-
-
Grant Access to Key Vault:
-
In the Azure portal, navigate to your Key Vault.
-
Go to Access policies and add a new access policy.
-
Select your resource’s Managed Identity as the principal and grant the necessary permissions for secrets (e.g., Get, List, Set).
-
-
Retrieve Secrets from Key Vault in Your Application:
- Use the
DefaultAzureCredentialclass to authenticate with Key Vault.
- Use the
d) Benefits of Using Managed Identity
- Enhanced Security, Simplified Authentication, Improved Control, and Reduced Maintenance
Configuration Changes and Their Impact
When you add or update configurations in Azure Key Vault, the timing of when these changes take effect depends on the type of Azure resource your application is running on. Here’s a breakdown for common scenarios:
-
Azure App Service (Web Apps): Configuration changes in Azure App Service (set under Application Settings) typically require a restart of the App Service for the changes to be applied.
-
Azure Functions: For Azure Functions, configuration changes usually take effect on the next invocation of the function. A full restart is not required for most configuration updates, but if the configuration is tied to a host-level setting (such as connection strings or bindings), a host restart might still be needed.
Enterprise Integration Scenarios (Expanded and Detailed)
Modern applications rarely operate in isolation. Experienced developers often integrate Azure Key Vault with CI/CD pipelines (Azure DevOps, GitHub Actions) to ensure secure automation without exposing secrets. Below is a detailed breakdown of how Key Vault can be used in enterprise-grade pipelines.
Azure DevOps CI/CD Pipelines (Compact Overview)
Azure DevOps offers the AzureKeyVault@2 task, which pulls secrets securely from Key Vault during pipeline execution.
Why Use It?
-
Secrets never appear in YAML.
-
Injected as environment variables at runtime.
-
Automatically masked in logs.
-
Helps maintain enterprise security/compliance.
Requirements
-
Azure Service Connection with Key Vault access.
-
RBAC role:
-
Key Vault Secrets User (minimum)
-
or Key Vault Reader (read-only)
-
YAML Example
steps:
- task: AzureKeyVault@2
  displayName: 'Fetch secrets from Azure Key Vault'
  inputs:
    azureSubscription: 'My-Service-Connection'
    KeyVaultName: 'my-keyvault'
    SecretsFilter: '*'
How It Works
-
SecretsFilter: '*'retrieves all secrets. -
Secrets become environment variables.
Example:
ApiKey→$(ApiKey) -
Values remain masked even if printed.
Using the Secret in a Task
- script: |
    echo "Building backend..."
    dotnet build --configuration Release
    echo "Using Key Vault secret: $(ApiKey)"
  displayName: 'Build App Using Key Vault Secret'
🔐 Even if echoed, $(ApiKey) stays hidden in logs.
6. Conclusion
Using Azure Key Vault in your .NET apps helps safeguard confidential information, ensures optimal application efficiency, and supports modern cloud and enterprise best practices.